Creating an Article
Log in to the Jarbo Knowledge backend at jarbo.knowledge/administrator.
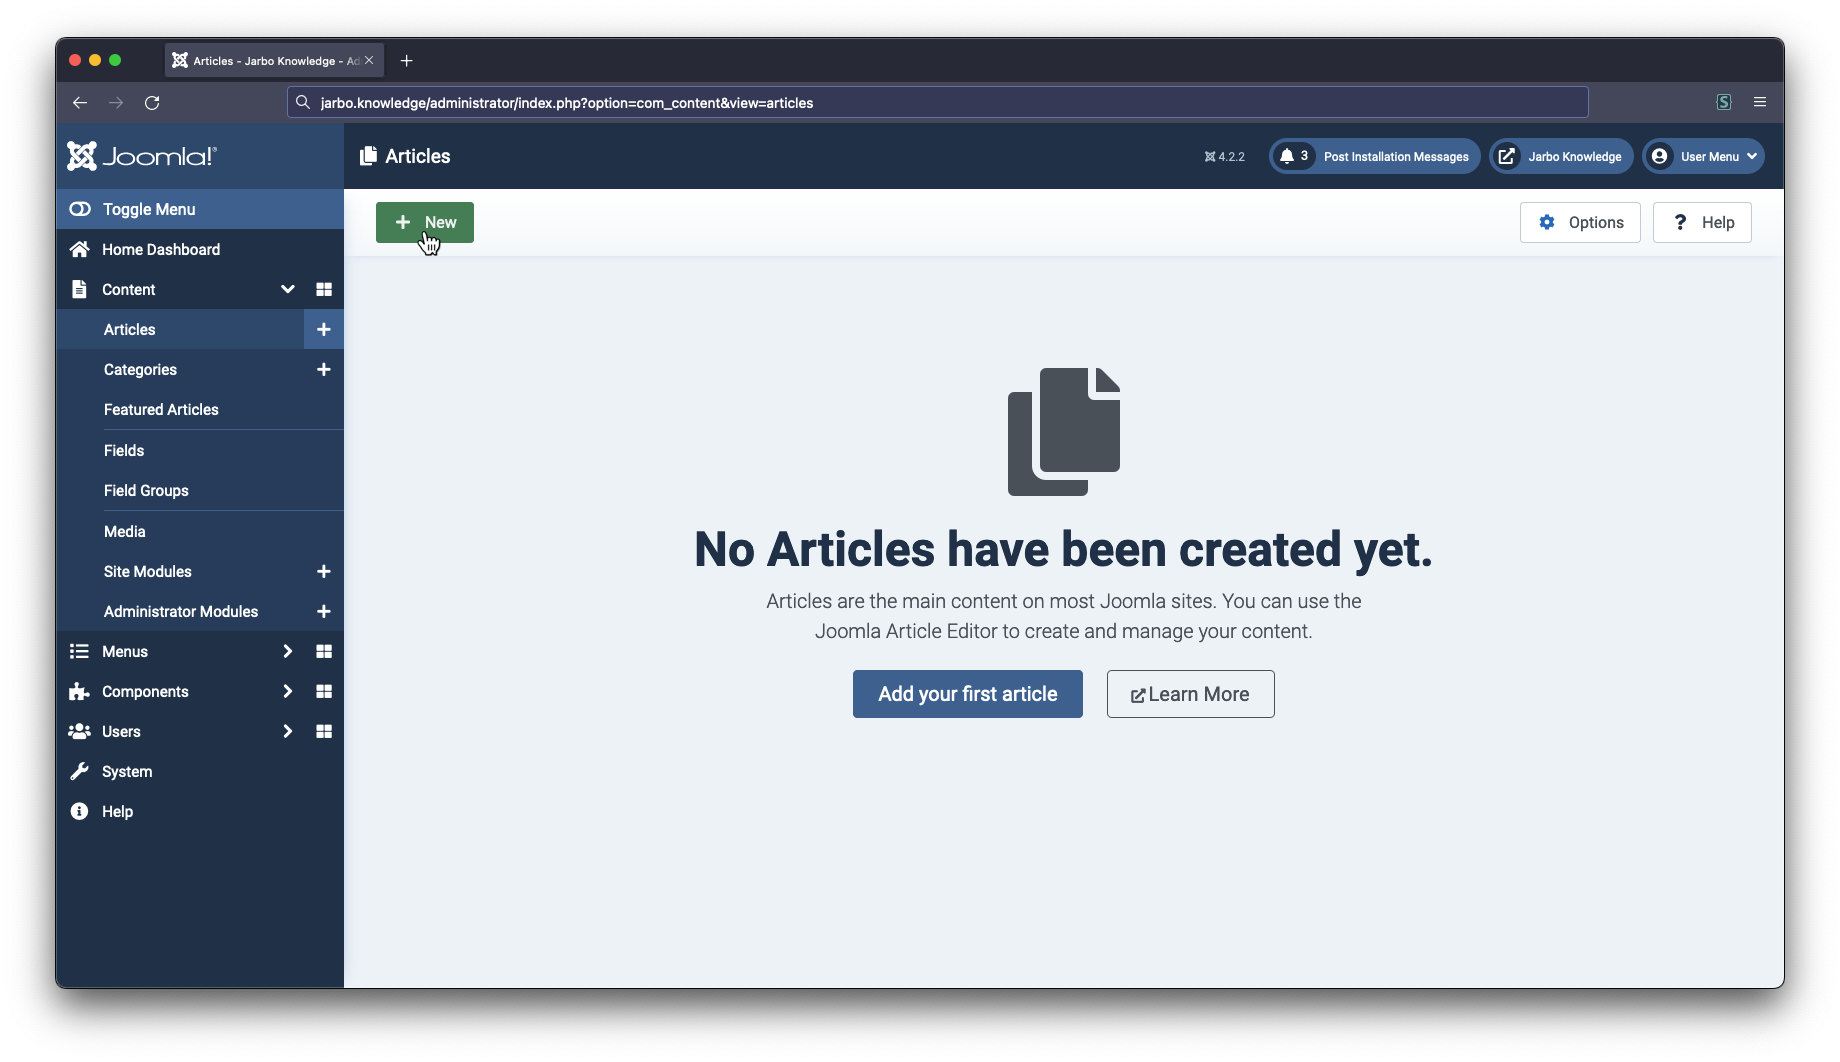
Once logged in, click Content > Articles in the sidebar.
Click on the "New" button in the top left.
Enter the title for your documentation item, and then add the content. Make sure to follow a logical heading heirarchy in your article.
Second Level Heading (h2)
|-- Third Level Heading (h3)
|-- Third Level Heading (h3)
Second Level Heading (h2)
|-- Third Level Heading (h3)
h1). The article title will automatically be used for the top level page heading.
Adding Tags
Be sure to appropriately tag your article. This helps with search-ability and makes sure your article is included in the correct documentation lists.
On the right side of the Article Editing view, use the Tags field to either type or select appropriate tags for your article.
![][/]
Set the Author
If you are not the appropriate person to provide clarification on your article topic, make sure to set the author to the person that should provide that information (often this is just the subject matter expert).
In the Article Editing view, select the Publishing tab, and change the Created By field.
![][/]
Adding the Article to Menus
still working on this section :)
Article Formatting Tricks
There are a few things you can take advantage of when writing your documentation articles.
Images
Adding images is straightforward. You only need to add the image to the article, no need to fuss around with styling—it's all handled for you.
Callouts
You can easily add callout blocks to your documentation articles using a content tag. There are two options you can set for your callout as well: emoji and type.
The emoji option sets what emoji appears in your callout. type is optional and controls the color, with these options:
- Default,
typenot set: the typical orange type=warning: a slightly more attention-grabbing yellowtype=error: a red callout, good for serious warnings
These options look like so:
type=warningtype=errorHere's a full example of how to add a callout to your article (you can copy this code):